
When you’re running the laundry, it’s important to understand that the whole thing is actually a rather complicated process.
Not only are there a multitude of different parts to consider, many of said components are interlinked into larger systems. Knowing how everything works and how to fix any problems with those individual and gathered parts will help you better handle your dryer’s processes.
An important set of devices within the dryer is what is called the heating element assembly.
The heating element assembly is critical in the functioning of the dryer as a whole, and it, therefore, needs to stay in optimal condition for the dryer to fulfill its laundry objectives.
The heating element assembly may seem tricky, but with a little help, you can see how it and its individual components all work in the dryer.
How the Heating Element Assembly Functions
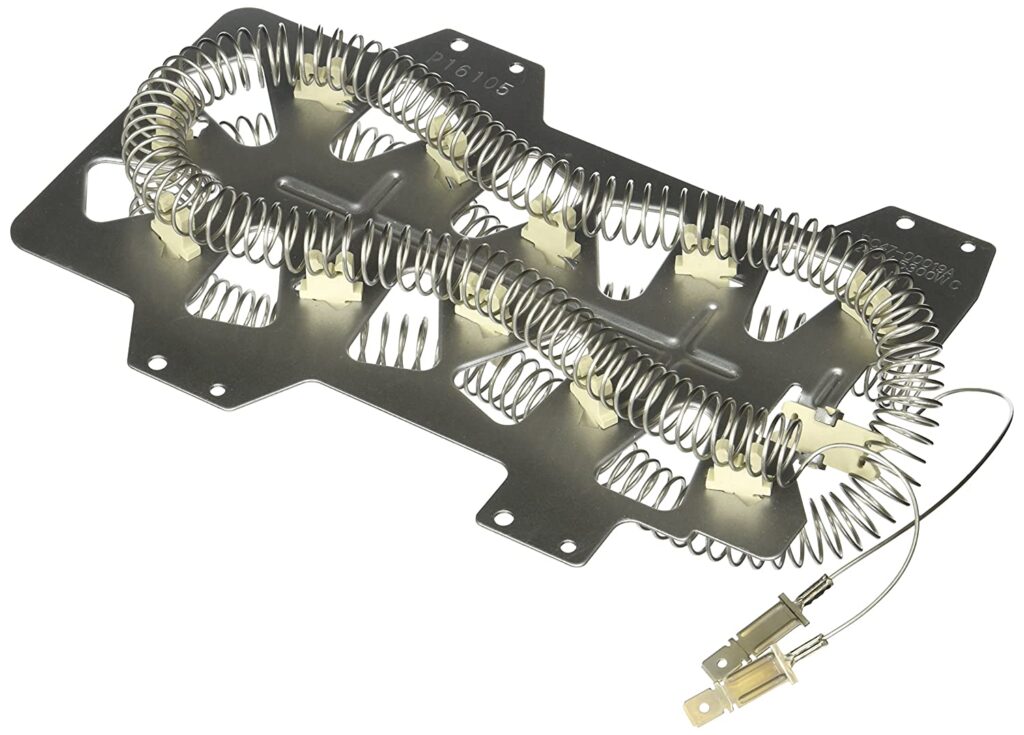
Photo credit to Amazon
The exact form of the heating element assembly is different depending on manufacturer, brand, and model. That being said, they all have the same overall purpose within the dryer: to provide the heat that the drum and the dryer use for the drying cycle with the laundry.
The system usually does so either through the blower or in the back of the drum.
The heating element assembly contains multiple components that work together to fulfill the assembly’s function. Some specific items may or may not be available depending on the specific type of heating element assembly.
For instance, this one lacks screws and heat shields with the purchased assembly. Check the specifications of your dryer model to determine the exact details of the element.
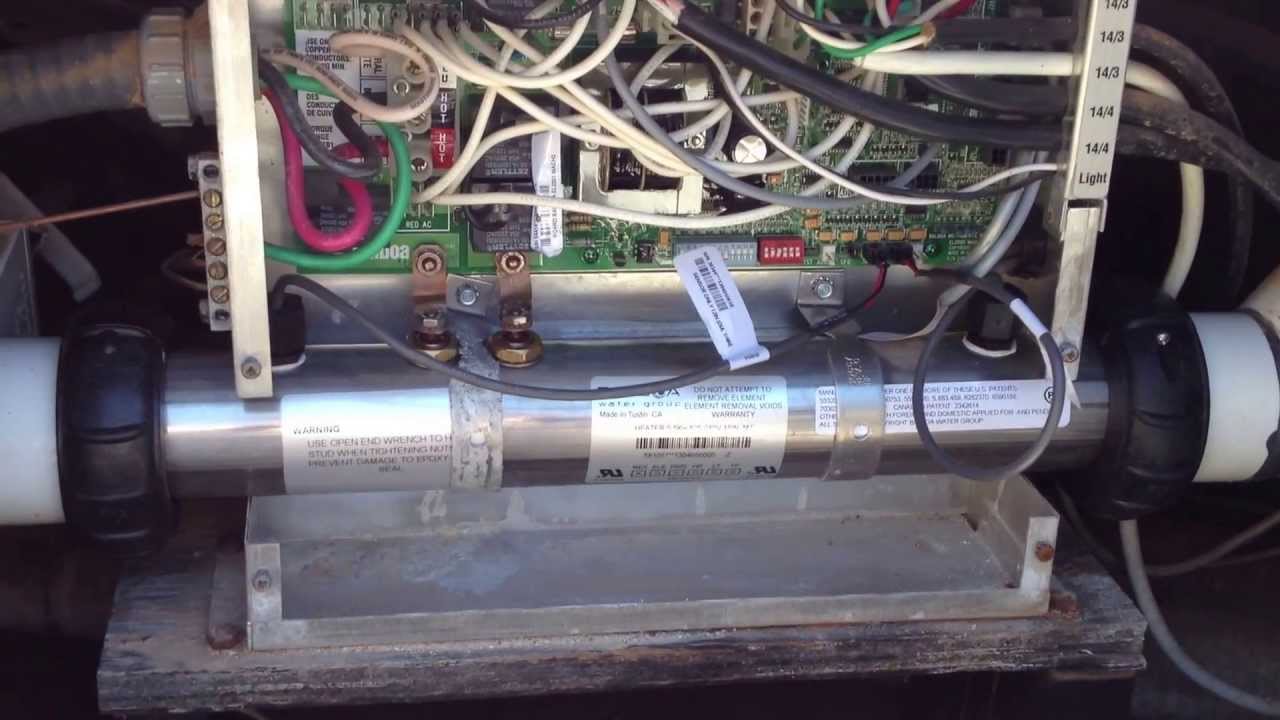
Testing the Heating Element Assembly

Photo credit to YouTube
Since the heating element assembly is needed to heat the dryer, which is the main way in which the dryer dries clothes, problems with the heating element assembly can inhibit your plans for laundry.
Even so, other things in the dryer can also prevent the heat from getting through. Therefore, it’s best to be on the safe side and check the heater housing of the element before taking any drastic measures.
To test the heating element assembly, SF Gate recommends accessing the thermostat attached to the element and connecting the terminal’s wires to those of the continuity tester’s terminal. If you see the tester light up, the assembly is still good, otherwise, the heating element no longer works. You can also try a similar testing procedure on the heating element assembly using a multimeter instead.
Repairing the Heating Element Assembly
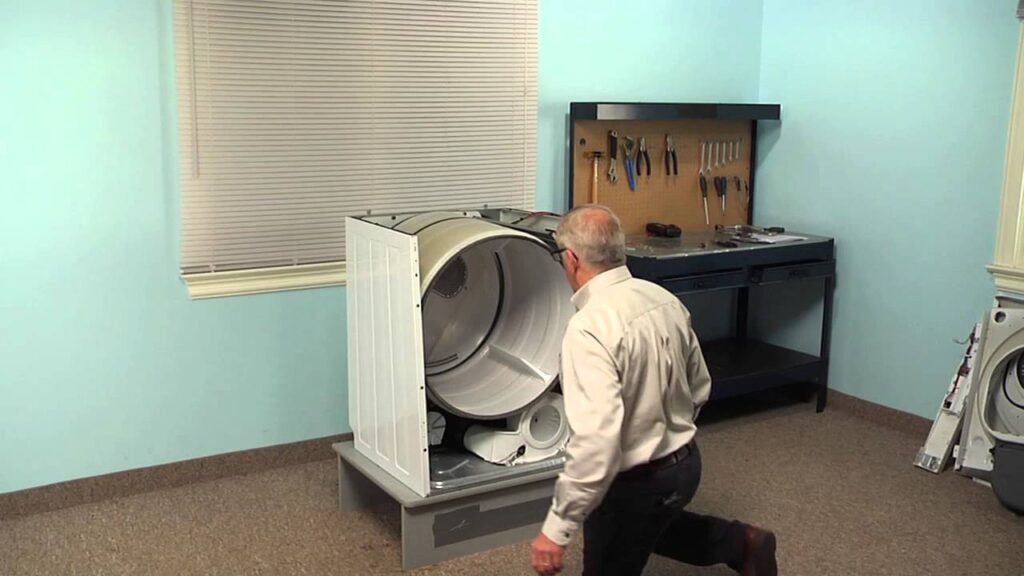
Photo credit to YouTube
If you have determined that the heating element assembly really is the reason behind the scarcity of heat, the question then becomes whether you should repair the unit or replace it.
Both are valid options and should be considered depending on the circumstances of the issue. After all, given how the heating element assembly consists of multiple parts, it is possible that you may only need to fix a single piece.
Just make sure you know how the different parts work so you can make a fair assessment of the situation and choose accordingly.
While repairs can often save you the trouble of buying replacements, the heating element assembly will eventually wear out entirely and need to be replaced even with repairs to the individual parts of the mechanism.
Safety and effectiveness are your top priorities.
Replacing the Heating Element Assembly
Photo credit to greatby8.com
When the damage to the heating element assembly is beyond repair, a replacement unit should be installed into the dryer.
First, unplug the machine and move it into a more accessible position.
AppliancePartsPros then directs that, as when testing the heating element assembly, you should remove any panels and other parts of the dryer that prevent access to the device.
When you can reach the element, remove moisture sensors and other things that may get tangled. Remove the screws and any other fasteners so you can take out the old heating element assembly.
Once you are ready to attach the replacement assembly, be careful so that the wires hook up in the right places.
Reassemble the rest of the dryer accordingly, and everything should be good to go.
An Interconnected System of Tools
The heating element assembly is a prime example of how multiple parts in the dryer are grouped into larger components that all, in turn, work together to make the dryer run.
Because of the complexity of and links between the individual parts, your knowledge of your dryer should cover not only each specific piece but how they all connect to one another.
Given the many parts, it’s easier said than done.
But who says you have to do it all on your own? At Dryernotheating.net, we provide the support you need to maintain your dryer’s health. You find all the tips, repair hacks, and how-tos to help you repair your dryer.