
Clothes dryers are a commonplace appliance in many homes. We often fail to consider the maintenance of many appliance workhorses. Dryers need some routine maintenance to ensure their safety and functioning over time. The replacing of a dryer hose is one of the maintenance items that should be performed on a regular basis. Here, we hope to demonstrate to you why dryer vents and hoses are important, how to maintain them on a regular basis, and how simple it is to complete this routine task on your own.
WHY IS A DRYER HOSE AND VENT IMPORTANT?
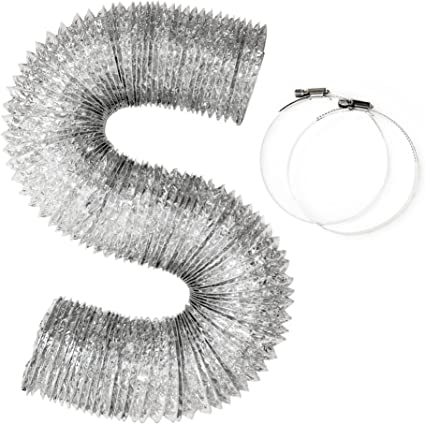
Image via: Amazon
There are different qualities and types of dryer hoses to use. Our directions here are for the metal flexible type of hose that is common with most dryers. A less expensive option is a plastic hose, however, these lack structural integrity, and they collect lint and moisture. The highest quality dryer vent hoses are rigid, and we address these a little in the tutorial; however, rigid vents are more difficult to measure, cut and install correctly and more expensive to purchase.
Regardless of the type of dryer hose your dryer has, the hose and vent are important and neglected parts of the household dryer. A hose moves heat, moisture, and lint from the dryer to outside of the house. The vent prevents insects and creatures from traveling from the outside in and helps provide a seal between the wall and the hose. These features are for household safety and comfort. Let’s explore some reasons dryer hoses are essential.
MOISTURE
GENERAL HEALTH
ALLERGIES AND ASTHMA
CARBON MONOXIDE
FIRE
EFFICIENCY
UPKEEP FOR A DRYER HOSE
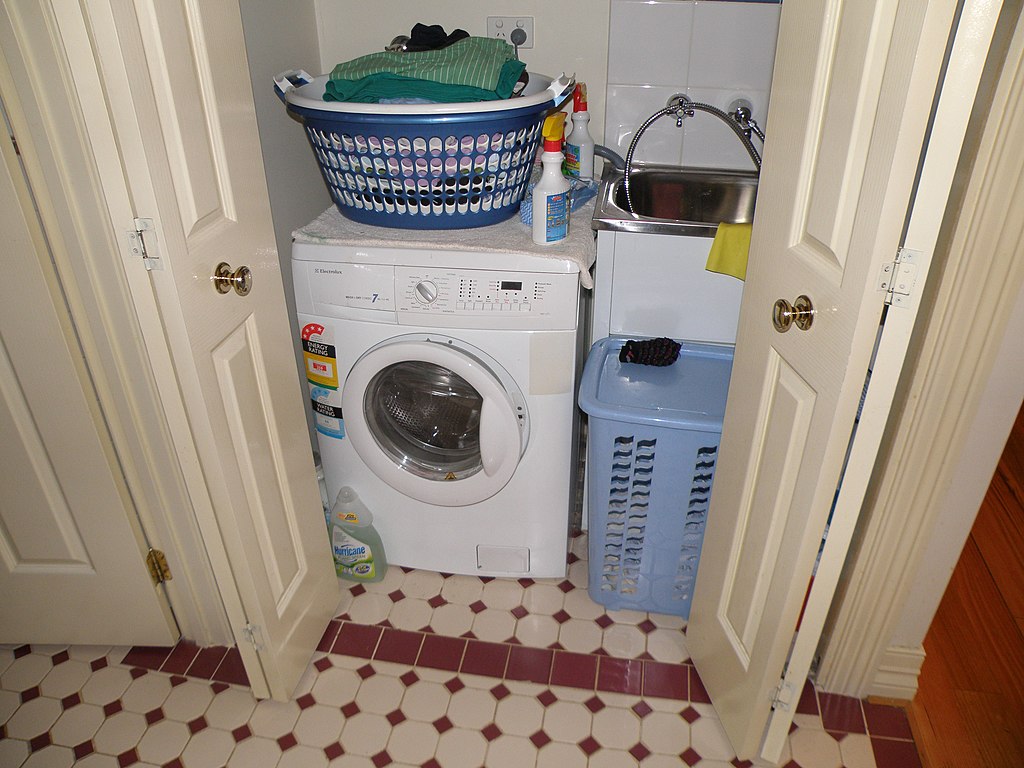
Image via: Wikimedia Commons
You should inspect your dryer vent hose periodically. It should be firmly attached to the dryer side on one end and to the vent on the wall side on the other end. The hose should have no tears or holes and should not have any significant kinks in it. Replace your hose or upgrade it if you have any concerns. Even if they do not need replacing, dryer exhaust hoses and vents should be removed and cleaned every six months or so to reduce lint build up.
It is not difficult to replace a dryer vent hose, and it takes only some simple tools and a small time and money investment. The increase in safety, health, and efficiency that accompanies routine dryer hose inspection and replacement is worth the price. We have taken the time to outline for you what supplies you will need and the steps you will take to replace your dryer vent hose. These same steps can be modified for plastic vent hoses (not recommended), rigid dryer hoses, or simply routine cleaning of your dryer hose and vent.
SUPPLIES YOU MAY NEED TO REPLACE A DRYER HOSE
- New dryer hose
- Hose clamps x2
- Metal duct tape
- Flathead screwdriver
- Flashlight
- Silicone caulking and caulking gun
- Measuring tape
DRYER HOSE INSTALLATION GUIDE
Image via: Pixabay
STEP ONE – INSPECT THE CURRENT DRYER HOSE
Pull the dryer forward and look behind it. Use a flashlight if needed. Look for any evidence of cracks, kinking or rotten spots in your hose. Identify if the dryer vent hose has come loose from the wall vent or the dryer itself.
STEP TWO – BUY YOUR MATERIALS
Check the supply list above against your current system. Materials for dryer hose replacement can be purchased as a full set or individually. Look at your local hardware store or online for universal kits. Kits will include the exterior vent, an aluminum hose, and duct collar(s); you may need to augment this kit with some metal clamps and duct tape.
STEP THREE – LOCATE AND REMOVE METAL CLAMPS
Your current dryer hose will be attached to the dryer and to the vent with either metal clamps or metal duct tape. Remove the clamps or tape. To remove the clamps, use a flathead screwdriver to loosen the clamps. Pull the old hose off of the dryer and the wall vent. Dispose of the used hose.
STEP FOUR – MEASURE FOR NEW DRYER HOSE
Use a measuring tape to measure the distance between the dryer exhaust vent and the wall vent. Note this measurement for later.
STEP FIVE – CLEAN OR REPLACE DRYER VENT
https://youtube.com/watch?v=KQAXcPIpuiQ%3Frel%3D1%26modestbranding%3D0%26controls%3D1%26showinfo%3D1%26fs%3D1%26wmode%3Dtransparent
If your dryer vent is in good shape and you are only replacing the dryer hose, vacuum the current vent thoroughly. Remove any clogged lint from the vent and surrounding wall. (If you are replacing the dryer vent and the hose, now is the time to do so.)
STEP SIX – VACUUM DRYER SIDE
Don’t save the cleaning for the wall side only. While you have the hose off the dryer, remove accumulated lint and vacuum out the dryer exhaust areas.
STEP SEVEN – CUT DUCT COLLAR AND ATTACH TO VENT
Use your metal shears or snips to cut the new collar to match the length of the old collar. Insert the collar into the vent.
STEP EIGHT – SEAL AND CAULK
Before replacing the hose, take time to re-caulk the dryer vent and the vent collar seam. Seal the collar to the vent with aluminum duct tape.
STEP NINE – EYEBALL FIT OF NEW DRYER HOSE
Place the hose loosely (do not secure yet) to check the length of the hose. You want the hose to be as short as possible (a shorter hose reduces lint build up) while limiting bends and twists between the dryer and the wall. Mark the hose at the length that fits best.
STEP TEN – MEASURE HOSE
Measure hose and mark it at the measurement you took in Step Four. Compare your eyeball estimate from Step Nine. They should be close. If not, double check before cutting. (Note – if using a rigid dryer vent hose, use care in this step to ensure you have accounted for all joints needed.)
STEP ELEVEN – CUT NEW DRYER HOSE
Put tape around the hose where you will cut. This will keep your new dryer hose from being too ragged once cut. Place on a firm surface. Cut the hose to the correct length with metal shears or nips. Wear thick gloves for safety. (Note – if using a rigid dryer vent hose, cut carefully so that all joints will fit together.)
STEP TWELVE – FIT NEW DRYER HOSE
https://youtube.com/watch?v=tbEwAXWoINQ%3Frel%3D1%26modestbranding%3D0%26controls%3D1%26showinfo%3D1%26fs%3D1%26wmode%3Dtransparent
Place the new hose into the vent collar on one end and the dryer exhaust vent on the other end. (Note – if using a rigid dryer vent hose, piece each section together at joints. Minimize the number of joints as much as possible.)
STEP THIRTEEN – SECURE THE HOSE AT EACH END
Use the metal clamps or metal duct tape to secure the hose at each end. If using metal clamps, slip them over the hose before fitting the hose to the vent or the dryer exhaust. Then, move clamps around vent or dryer exhaust and tighten screws. (Note – if using a rigid dryer vent hose, this is when you will seam each joint with duct tape.)
STEP FOURTEEN (OPTIONAL) – SECURE THE DRYER VENT HOSE WITH PIPE STRAPS
Fix the dryer vent hose to the wall with screws and pipe straps. We recommend one pipe strap for every six to eight inches of dryer hose. (Note – this step is much more important when using a rigid dryer vent hose).
CONCLUSION
Image via: Pixabay
Installing your own dryer hose is a fairly easy task, and it does not take much time or a large monetary investment. It is part of dryer maintenance to routinely inspect dryer vents and hoses and replace them when needed. To do so is to ensure your dryer continues working well, and that your household and its occupants are ensured health and safety. With a few simple tools, some time, and a trip to the local hardware store, you will replace your dryer vent hose in an hour or less.